In this tutorial we’ll cover the very basics of FlashPunk. This will serve as a primer for most of the other tutorials, so once you’ve got your code editor working and SWFs compiling, start here.
- Step 1: Start the Engine
- Step 2: Creating Worlds
- Step 3: Creating Entities
- Step 4: Embedding Graphics
These tutorials serve to teach you how to make games using FlashPunk, but do not teach you the basics of ActionScript3 and how to use it. There are already plenty of resources available to learn how to do the latter. I recommend doing a few primers and learning some basics such as Classes, Objects, variables, variable scope, and basic AS3 operators before diving into FlashPunk.
Step 1: Start the Engine
The starting point in all Flash games is the Main class, and so it will also be the starting point in your FlashPunk projects. Usually, your Main class extends the Flash Sprite class, and might look like this:
package
{
	import flash.display.Sprite;
	public class Main extends Sprite
	{
		public function Main()
		{

		}
	}
}
But the FlashPunk framework has a bunch of operations it does in the background, so it already has a specialized Sprite class which your Main class will extend. This is the Engine class. So to initiate your FlashPunk game, your Main class will look something like this:
package
{
import net.flashpunk.Engine;


	public class Main extends Engine
	{
		public function Main()
		{
			super(800, 600, 60, false);
		}
	}
}
We’ll bring our attention to the call to super(), which is the starting point for FlashPunk. This super() call to Engine’s constructor sets some important parameters for our game, which are:
- Width of the screen (pixels)
- Height of the screen (pixels)
- Framerate of the game (frames per second)
- Fixed-framerate (defaults to false)
The last parameter is important, because it decides what type of timestep we want to use for our game. But for now leave it as false, different timesteps will be discussed in more detail in later tutorials. Now, let’s test if FlashPunk is starting up properly with a trace. To do this, we’re going to override Engine’s init() function, like so:
package
{
	import net.flashpunk.Engine;
	public class Main extends Engine
	{
		public function Main()
		{
			super(800, 600, 60, false);
		}

		override public function init():void
		{
			trace("FlashPunk has started successfully!");
		}
	}
}
Engine’s init() function is a function called by FlashPunk when (and only when) the game starts up for the first time, and everything is ready to go. Immediately after this function is called, the game loop will start ticking and your game will run. So test the game and see if the trace shows up, and if so we can move onto the next step.
Step 2: Creating Worlds
When FlashPunk starts ticking, the game loop updates a specific World. World is an organizational class in FlashPunk: you can have any amount of Worlds you want, but only one World can be active at once, and when a World is active, it will update and render all and any Entity objects added to it. So a simple game might have a Menu and Gameplay World. More complex games, such as a level-based platformer, might have a menu World and then a separate World for each level of the game. It’s up to the developer how they organize it.
So if we were to create a new World called MyWorld, we’d create a new class and extend World, like this:
package
{
	import net.flashpunk.World;
	public class MyWorld extends World
	{
		public function MyWorld()
		{

		}
	}
}
To change the currently active World in FlashPunk, you just have to set the FP.world property to the World you want to switch to. So now, to set MyWorld as the starting World of our game, we’ll go into our Main class and add in the following lines:
package
{
	import net.flashpunk.Engine;
	import net.flashpunk.FP;


	public class Main extends Engine
	{
		public function Main()
		{
			super(800, 600, 60, false);
			FP.world = new MyWorld;
		}

		override public function init():void
		{
			trace("FlashPunk has started successfully!");
		}
	}
}
Now, MyWorld is being updated by your Main Engine class, and will subsequently update any Entities that you add to it, which is what we’ll cover in the next step.
Assigning FP.world does not immediately change the active World, but instead sets an internal flag to change the World at the end of the frame. So the World will not actually be switched until the current frame in your game loop has completed.
Step 3: Creating Entities
Now we’ve got our Engine running, and making our World tick, but no actual game objects in our program. So the next step is to work with the most common class you will be working with in FlashPunk, the Entity class. An Entity represents any game object that can:
- Update (movement, AI, and perform other game logic)
- Render (draw graphics to the screen)
- Collide (interact with other Entities)
For example, a simple Player Entity might move around in its update step, draw a sprite to the screen in its render step, and die when he collides with a Spike Entity. But in order for Entities to do any of this, they need to be added to a World. So first we’ll create a new Entity class called MyEntity, like this:
package
{
	import net.flashpunk.Entity;
	public class MyEntity extends Entity
	{
		public function MyEntity()
		{

		}
	}
}
Now that we’ve created our Entity class, we can add it to our world. Open up MyWorld again and add this line into its constructor:
package
{
	import net.flashpunk.World;
	public class MyWorld extends World
	{
		public function MyWorld()
		{
			add(new MyEntity());
		}
	}
}
This uses the World class’ add() function to add a new instance of our MyEntity class to the World when it is created.
Conversely, you can remove an object from a World with the remove() function.
So now, when our World is created and set active, it will tell this Entity to update and render. Let’s test this; go into MyEntity and override its update() function, like so:
package
{
	import net.flashpunk.Entity;
	public class MyEntity extends Entity
	{
		public function MyEntity()
		{

		}

		override public function update():void
		{
			trace("MyEntity updates.");
		}
	}
}
When a World’s update is called, it subsequently calls update() for all Entities contained within it. In order to add specific actions to your Entity when it updates, you can override its update() function like we’ve done here. In this case, I’ve just added a simple trace that we will look for to tell if our Entity is updating. If you test the game, the trace message should appear once every frame, at the framerate specified in your Main class’ constructor (in this tutorial, I set it to 60 frames per second).
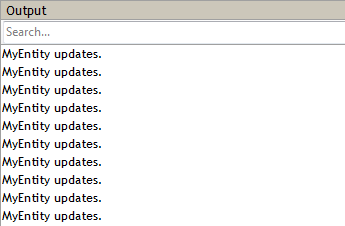
Our message tracing at 60 FPS.
Step 4: Embedding graphics
Since FlashPunk games are designed for bitmap graphics, the image types you’ll be working with are mostly PNG, GIF, and JPEGs. Once you’ve got an image prepared, find a place in your project directory to store your graphics and move the image into there. For example, I’m using this little sprite:
![]()
2010 © Jared Cohen
And I put it in a folder called assets. Now, to get it into my game, I have to embed it into a game class. For this example, I will open up our MyEntity class and embed it like so:
package
{
	import net.flashpunk.Entity;
	public class MyEntity extends Entity
	{
		[Embed(source = 'assets/player.png')] private const PLAYER:Class;

		public function MyEntity()
		{

		}
	}
}
The first line embeds the file found at the specified location (relative to this class), and the second line assigns that embedded file to a property. The property doesn’t have to share a name with the file, it can be anything you want, such as PLAYER_IMG, PLANE_SPRITE, or just PLAYER like I’ve used. Just make sure that each embedded file has a unique property reference.
If you’re using FlashDevelop, you can right-click on the image in your project and choose “Generate embed code” to automatically insert an asset metatag at the cursor.
But embedding the file alone doesn’t display it on our game screen; in order to do this, we have to tell our MyEntity class to render it to the screen. In FlashPunk, the usual way to go about this is to create a Graphic object and assign it to the Entity’s graphic property. FlashPunk has several types of Graphic classes available for different purposes. For this example, since our graphic is just a single, non-animated plane sprite, we will use the Image class, like so:
package
{
	import net.flashpunk.Entity;
	import net.flashpunk.graphics.Image;


	public class MyEntity extends Entity
	{
		[Embed(source = 'assets/player.png')] private const PLAYER:Class;

		public function MyEntity()
		{
			graphic = new Image(PLAYER);
		}
	}
}
If you save that and then run your game, your Entity will render the assigned Graphic at its current location, which is (0, 0) by default (top-left corner of the screen). And that’s the very basics of Entity graphics!
This tutorial is still a work in progress!
Tasks required to complete:
- Anchor links for table of contents (currently unavailable in CMS).
Original tutorial by Chevy Ray Johnston.